Baby Dress for Baby Sister

Posted on

I wanted to try out a retro Simplicity pattern to see if I would like it as a blessing dress for the new baby (although that would mean actually deciding on a name sometime before July). And after seeing one made on A Feathered Nest’s blog (on my sidebar) I went for it with one of my coveted Heather Bailey Freshcut prints. I have such a hard time cutting into my stash of designer fabrics, but I can’t buy more if I don’t use what I have, blah, blah, blah. It’s not the best picture since the quilt I used as a background is too busy, but I did like how it turned out. Not quite what I had in mind for a blessing dress, but still cute. It has pleats on the front and I think I want pintucks instead. So, I’ll keep looking around and maybe try to modify this pattern before I use the Swiss batiste I bought. BTW, my mom made the quilt in the background for my birthday using 30’s prints that I love.


Doodle Purse

Posted on

My daughter had a birthday party to go to, so I made a Doodle Purse based on this tutorial at MaKC Creations for a birthday present. I had bought a pad of paper and Pipsqueak markers at Target to go in it and sort of modified some of the dimensions. The individual pockets for the markers didn’t work out, so after three tries and a lot of seam ripping, I decided to make one big, pleated pocket to hold them. The pleats keep the outside lying flatter and I closed the pocket with two pieces of velcro. I really wanted the individual pockets for each marker but I think this works out better because now the birthday girl can put whatever markers, crayons or pens she wants in there.

I used a button and a hair elastic to keep it closed.
After way more time than it should have taken, I think it turned out pretty cute. Next time I might have the marker pocket opening on the end closer to the pockets so when the purse is closed, the pocket opening is upright, instead of upside down. I like going for more useful presents for birthdays since I never know what to get for A’s preschool friends.


An Easter Dress

Posted on

I finished Allison’s Easter dress last week. I used some Amy Butler Love fabric that I got from the new fabric store in town, The Fabulous Fabric Shop, as well as some fabric from my stash. Shirring is my go-to technique lately, and I really like using a different fabric for the skirt. I got a few cute pictures of it, hopefully will get a few more on Easter. The tutorial I used was from Fave Crafts Sewing Crafts from Bloggers eBook. I sort of changed the construction order, but it was a really easy dress.


90 minute (well almost) shirt

Posted on

I wanted to jump on the bandwagon of making a cute lapped-neck t-shirt like Dana from MADE for boy month. Well, it wasn’t quite a 90 minute enterprise. Actually, it was kind of cursed from the start. I didn’t have a onesie in Ian’s size that I could take apart, but I did have a Simplicity pattern of a lapped-neck t-shirt. But, it was only a medium and I knew it wouldn’t fit. So, I had to make sure I cut the pattern bigger, and especially longer. As cute as his little chubby tummy is, I’m not a fan of it hanging out of his shirt. And I wanted to try it on something other than the nice green knit fabric I bought. I found a NASA Langley t-shirt I had been holding on to, but knew I would never wear again. Perfect. I cut out the short sleeve pattern, cut the ribbing for the neck, then went to serge the edges for a bit of decoration. Apparently, my old, slightly cranky serger doesn’t do knits. I thought that kind of was in the job description of a serger. But I ended up with a skipped stitch every inch or so down the ribbing. Not pretty. I pulled out the stitching (because I’m a cheapskate and hate wasting fabric) and went ahead and sewed it to the neck edges. Except I forgot to take into account that the pattern calls for folding down a 5/8″ hem at the neck instead of ribbing. The neck edges ended up too high up and covered part of the logo on the shirt, which was the whole reason for using that particular shirt in the first place. Picking out the stitches was not an option: I had used the knit stretch stitch on my machine and it is a pain to pick out. So, I wasted the ribbing after all by just trimming the neckline and starting over with new ribbing. And long story even longer, the shirt wasn’t quite long enough to do I deep enough hem to lay nice. Oh well. It turned out cute in the end.


One More Baby Item

Posted on

I’ve been meaning to make the Undercover Crate pattern for a long time but just never got around to finding a crate. I found little ones at the dollar store that were perfect to hold the baby shower gift previously posted. The pattern is really easy (and free!). At the end of the pattern, it tells you how to modify the pattern to fit any sized crate. I just changed the side B length (the pink fabric), since it was a little crate (only 6″ high) so 9″ wouldn’t have let the brown fabric be seen on the outside. I took off a couple inches from the pink height and added it to the brown inside fabric height. Very easy project and turned out great results. I need to make a few more for the kid’s rooms. This crate was 6″h x 8 1/2″l x 7 1/2″ w. I had bought 1/3 yard of each of the fabrics and just barely squeezed it out of the brown, so a little more would have been nice. I also added a covered button to the middle front of the long side. A bow would have been nice, too. A cute, useful packaging option for gifts.


Something accomplished today

Posted on

This afternoon has been one of those: Ian is teething and getting over a cold, so he in no way shape or form took a nap or even a quiet rest. He spent most of the time fussing and crying. But, I was able to ignore him long enough to try one of these felt rose clips from PurlBee. It’s really cute. I need to cut out a bunch to work on when I’m waiting for ballet class to get done or other little snippets of down time. It’s one of those self-contained projects that you can work on a little bit at a time and take all the supplies with you. I do need to find some more of the nice felt. There isn’t a very big color selection in town and if you’re going to go to all the trouble to hand-stitch something, it needs to be the good stuff.

Clamoring for my attention 🙂

Shirred Baby Dress and Ruffle-Bum Onesie

Posted on

I love making things for friend’s babies. A baby shower is a good excuse to get going and try something new. For a recent baby girl, I made an elastic smocked sundress with a ruffle-bum onesie to go underneath. I have done the sundresses before, but the ruffle onesie was something I had on the to-do list. I think it turned out cute. I’m a total perfectionist when it comes to some things, so I redid the first ruffle twice. The first time, the fabric underneath puckered, so I started over. Then I forgot to use a stretch stitch the second time so I went over the stitching with the knit stitch and ripped out the straight stitch. I guess I did it three times. The other two ruffles were much easier once I had that figured out. The knit stitch just ensures the stitches will stretch with the fabric.

Ruffle-bum onesie tutorial from Char by way of UCreate

Valentine’s Heart Garland Tutorial

Posted on


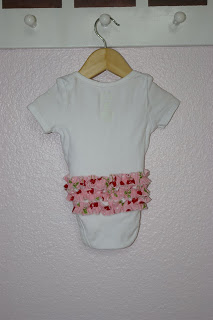
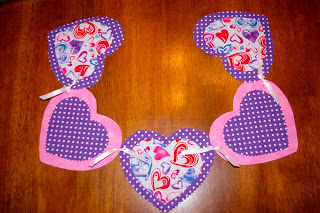
We made these garlands for YW two years ago. They were fairly easy, no sewing required. I saw the idea in the Feb ’08 issue of Better Homes and Gardens. There weren’t any specific instructions, so this is what I came up with. The garland is approximately 26″ long, with each heart 5 1/2″ wide. It’s kind of hard to get the scale from the picture.

Materials:
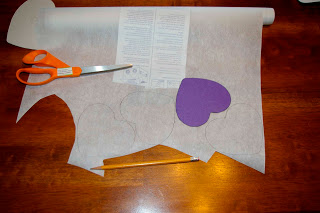
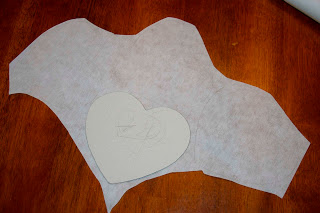
Heart template printed from here
***(I increased the biggest and next biggest hearts by about 1″ in Word. You can leave it the print out size, or increase it to however big you want) Trace the two biggest onto cardboard to make sturdy templates.***
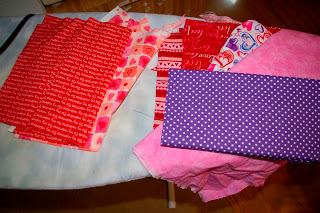
Two, or more, various valentines fabric prints (cotton or can use felt)
Decor Bond or WonderUnder (fuses fabric to other fabric)
Heavy interfacing (just one sided bonding)
Ribbon
Iron and ironing board
Hole punch
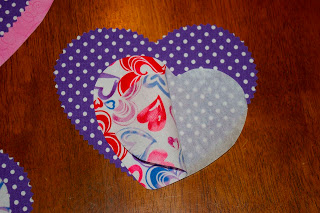
Start by tracing the largest heart (5 1/2″ wide with my enlargements) template onto the heavy interfacing (for stiffening the base fabrics). For my garland I made 5. You can make more or less depending on how long you want the garland. Roughly cut out hearts and iron the shiny side of interfacing onto the wrong side of base fabrics. I used two different fabrics for the big hearts.

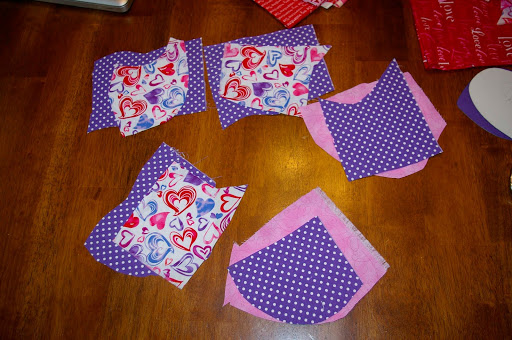
Next, trace the next largest heart (4″after enlargement) onto paper side of the double sided fusible web. Roughly cut out shapes and iron the non paper side onto the wrong side of contrast fabrics.

At this point, play around with the layout of your hearts. Put the smaller heart on top of the larger one.

Trim the hearts to the interfacing shape. The reason I waited was because I pinked the edges of some but not others with pinking shears. When you like the layout, take each set of two to the ironing board. Peel the paper backing off the small heart, center it on the large heart and fuse according to the directions.

Now you can string the hearts together into a garland, use to decorate a wreath, or give as valentine’s cards. To make a garland, use a hole punch (I think mine was 1/4″) to punch through the outer edges of the heart at the widest point. Use your first punched heart as a template to put the holes in the same spot on each one.

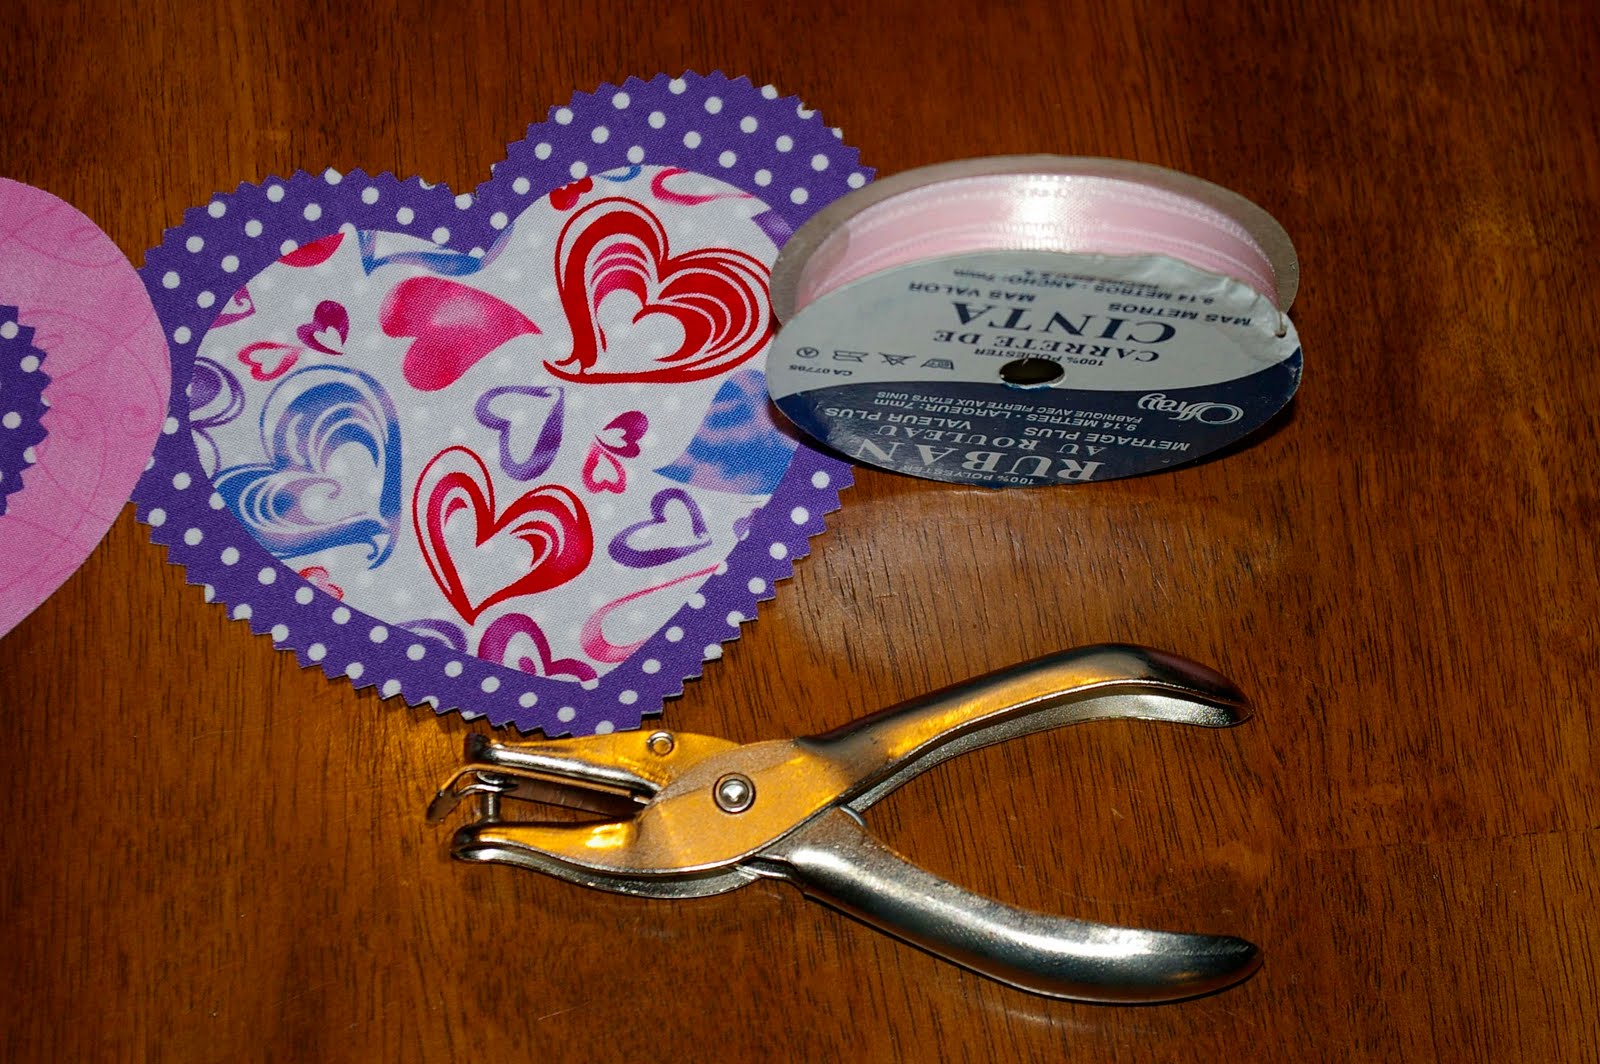
Cut a length of ribbon approximately 5″ long, depending on how much space you want between each heart. Heat seal or Fray-Check the ends, if desired. Then string ribbon through the holes and tie, leaving as much space as desired between hearts.
Add long lengths of ribbon to the ends to be able to hang it.
All in all, not too long of a project. Probably about an hour form start to finish. Unless, of course, you have one of these running around 🙂


Etsy Update

Posted on


I’ve finally updated my etsy shop. I had a lot of changing pads completed for a craft show, which was less than successful. Much less. And I’ve dropped the price since I redid the cost calculations. So, hopefully I’ll sell a few 🙂 I’ve been having a lot of fun making raggy name letters for lots of people and my next project will be attempting pettiskirts. I have been sewing, I just don’t remember to take pictures. I will try to remember to get a picture of Allison’s Christmas dress next time she wears it.